Showing posts with label Food. Show all posts

Monday, November 2, 2015

Cornbread, Chili, and Cheese


I made a  spicy chili yesterday just in time to eat today.  It always seems to taste better a day later, once the ingredients have had time to marry and get to know one another. The recipe is below.

Ingredients
  • 1 tbsp olive oil
  • 2 lbs lean ground beef
  • 1 large yellow onion, finely chopped
  • 3 cloves of garlic, finely minced (or 3 tsp ground garlic)
  • 2 (10 oz) cans diced tomatoes with green chilies
  • 1 (15 oz) can tomato sauce
  • 1/2 c beef broth
  • 2tbsp chili powder
  • 2 1/2 tsp ground cumin
  • 2 tsp paprika
  • 3 tsp cocoa powder
  • 1 tsp granulated sugar
  • 1/2 tsp ground coriander
  • 1/2 tsp ground red pepper
  • 1/2 tsp turmeric
  • salt and freshly ground black pepper, to taste
  • 1 (15 oz) can light red kidney beans, drained and rinsed

Serve topped with:
Cheddar and Monterrey Jack cheese, sour cream, chopped red or green onions, cilantro, roasted peppers, or hot sauce
Optionally serve with:
fresh cornbread, baked russet potatoes, saltine crackers or corn chips

Directions
Heat olive oil in a large and deep non-stick skillet over medium-high heat. Once oil is hot, add onion and saute 3 minutes, then add garlic and saute 30 seconds longer. Pour onions into a 6 or 7 quart slow cooker.
Return skillet to medium-high eat, add beef and cook stirring occasionally until beef has browned. Drain most of fat from beef, leaving about 2 Tbsp in with beef (this is optional, I think it ads flavor but you can drain it all if you'd prefer). Pour browned beef into slow cooker.
Add dry ingredients to a small jar, tighten the lid, and shake well to mix. Pour dry mixture on top of meat, onions, and garlic, and stir.

Add diced tomatoes with chilies, tomato sauce, and 1/2 cup water or beef broth, and kidney beans. Stir mixture, cover with lid and cook on low heat overnight. In the morning, turn temperature to warm. Eat for lunch or dinner. Chili is always better if it has a chance to rest before eating.

Enjoy!

Thanks for stopping by. Let me know how it turns out for you, or share a recipe with me. Give my page a "like" creative confetti (website) on Facebook, and subscribe on the right. Feel free to pin and share via the widget to the left, or leave me a comment. 

Tauna


Sunday, June 8, 2014

4th of July Free Printables (UPDATED)

Hello beautiful people. As a thank you for all the encouragement I've received to resume my blog, I thought I'd try my hand at simple, yet cute, Fourth of July printables.

Let's start with an invitation to your shindig. The back is blank, 
so you can add your particulars.


Fun Cupcake Toppers and 5X7 Frameables


Drink Labels


A USA Medallion Centerpiece


Pledge of Allegiance and God Bless America Frameables


Quirky Preamble Placemats


Decorating Tip: Use a curtain valance and ribbons to dress a decorative table. Tie a short piece of ribbon around napkin wrapped flatware for even more charm. 


What a fun looking table, and don't miss the Instant, No Sew Apron from the previous post, made from the matching valance.


And what would the Fourth of July be without homemade apple pie? 
Find the recipe HERE


Now onto the free stuff! Just click on the link below the image to to go to a printable PDF.


 Printables are for personal use only. They are not for commercial use.

Thanks for stopping by. If you like what you've seen, you can "like" my page creative confetti (website)  on Facebook, and subscribe on the right. Feel free to pin and share via the green widget to the left. I'd also love to hear from you, so leave a comment or send me an email.

Friday, May 23, 2014

Southern Salt Food Company (Food Truck) Review

(I totally jacked this picture from their Facebook page!)

Little Rock is hosting Food Truck Fridays at the corner of Capitol and Main. Unfortunately it began in April and only runs a couple of more weeks from 11:00-1:30. June 13th is the last chance to experience this mid-day fun.

There aren't many participating trucks, and they rotate from week to week. Today's offerings were two barbecue trucks (one mainstream, and one of the Asian variety), an Italian Ice cart, and a catfish/poboy truck.

My friends and I were delightfully pleased with Southern Salt Food Company's truck. It's a trailer rather than a truck, and it's quite charming. I didn't actually take a picture of the trailer today because I was too busy eating my lemon Italian ice as I stood in line for my Asian BBQ "cheese steak" sandwich. On site, the owners had taken the time to merchandise and stage the area surrounding their trailer with vintage coolers to hold cold drinks. The folksy props on the ground under the windows added to the ambiance.

The people running the food truck were genial and seemed to be enjoying themselves as well as their customers. That always enhances any experience.

But what about the food, you ask.

It was scrumptious. My Southern Salt "Cheese Steak" was hearty, but not heavy. It had a slight earthy flavor juxtaposition nicely with a savory sweetness. I wasn't sure if I could eat the entire sandwich, but I did. I was satisfied but not overly full. My friend Vicki ate the Loaded Bratwurst, and she was equally satisfied. She enjoyed the un-encased brat surrounded by the BBQ.

I am hoping to make it back to the last two Food Truck Fridays to see what other pickings there are to be had. The only negatives about today would be the deafening roar emitted by the generators of two of the trucks (not SSFC), as well as the fumes. The location is also problematic. While Capital and Main is centrally located, the corner isn't large enough to host many trucks. Then again, that would mean more generator noise and pollution.

Hopefully this trend will catch on. While Little Rock is a small city, I think it can accommodate a hearty food truck business. Even after FTF ends,  I hope to patron Southern Salt Food Company truck again in the future. Click HERE to go to their Facebook page.

Thanks for stopping by. If you like what you've seen then "like" my page creative confetti (website)  on Facebook, and subscribe on the right. Feel free to pin and share via the green widget to the left. I'd also love to hear from you, so leave a comment or send me an email.

Wednesday, July 24, 2013

Summer Iced Tea Party


My niece Caitie is part of a trio of best friends that have been together since baby-doll age. These three young women are extraordinary examples of fun-loving, Jesus girls. 

After spending over a decade together, they will be separating next month. Two will go to different universities, and one will join the military before heading to college. 

Caitie asked if we could have a tea party before everyone leaves. Of course it had to be an iced tea party, because who drinks hot tea in the summer in the South?

Our menu included sweet tea- regular and raspberry, zucchini and goat cheese tarts, and sugar cookies. We also served flower shaped cucumber and pink, cream cheese sandwiches, and mini, bite-sized apple & peach pies. 

DECORATING TIP: Add fresh flowers to a tea pot then stack on a plate and candle holder for a darling centerpiece. 

Mini pies stacked on plates and tea cups.

PARTY TIP: Print guest's initials on clear stickers and use as drink markers. You can also use a flower vase as a decanter, and don't forget adorable, paper straws.

Christmas ornaments were used to dress up a blah light fixture.

PARTY DECORATING TIP: Use four dollar store doilies and scrapbook paper to make medallions. I hung three in the kitchen for a festive look. Double the doilies if they are too thin.


DECORATING TIP: Dip dollar store silk flowers in water with food coloring. This will tone down the brightness of the flower. They still looked inexpensive, but these flowers were plopped in a tea pot behind a glass door as background dressing.

We had a "Miss Tea Party" pageant. Everyone was a contestant and had to answer a ridiculous interview question as if it were a real situation. 
PARTY TIP: Make pageant sashes by printing titles on clear, full-sheet stickers and adorn them with stick-on pearls and rhinestones. One page of jeweled accents decorated all six sashes and cost $1.00 at Michaels.

 PARTY TIP: Make a scepter out of a sturdy, cardboard tube from a large roll of aluminum foil. Glue finials to each end and spray paint the whole thing with silver, glitter spray. Once the scepter is dry, add a pink, acrylic drawer pull to finish the look.

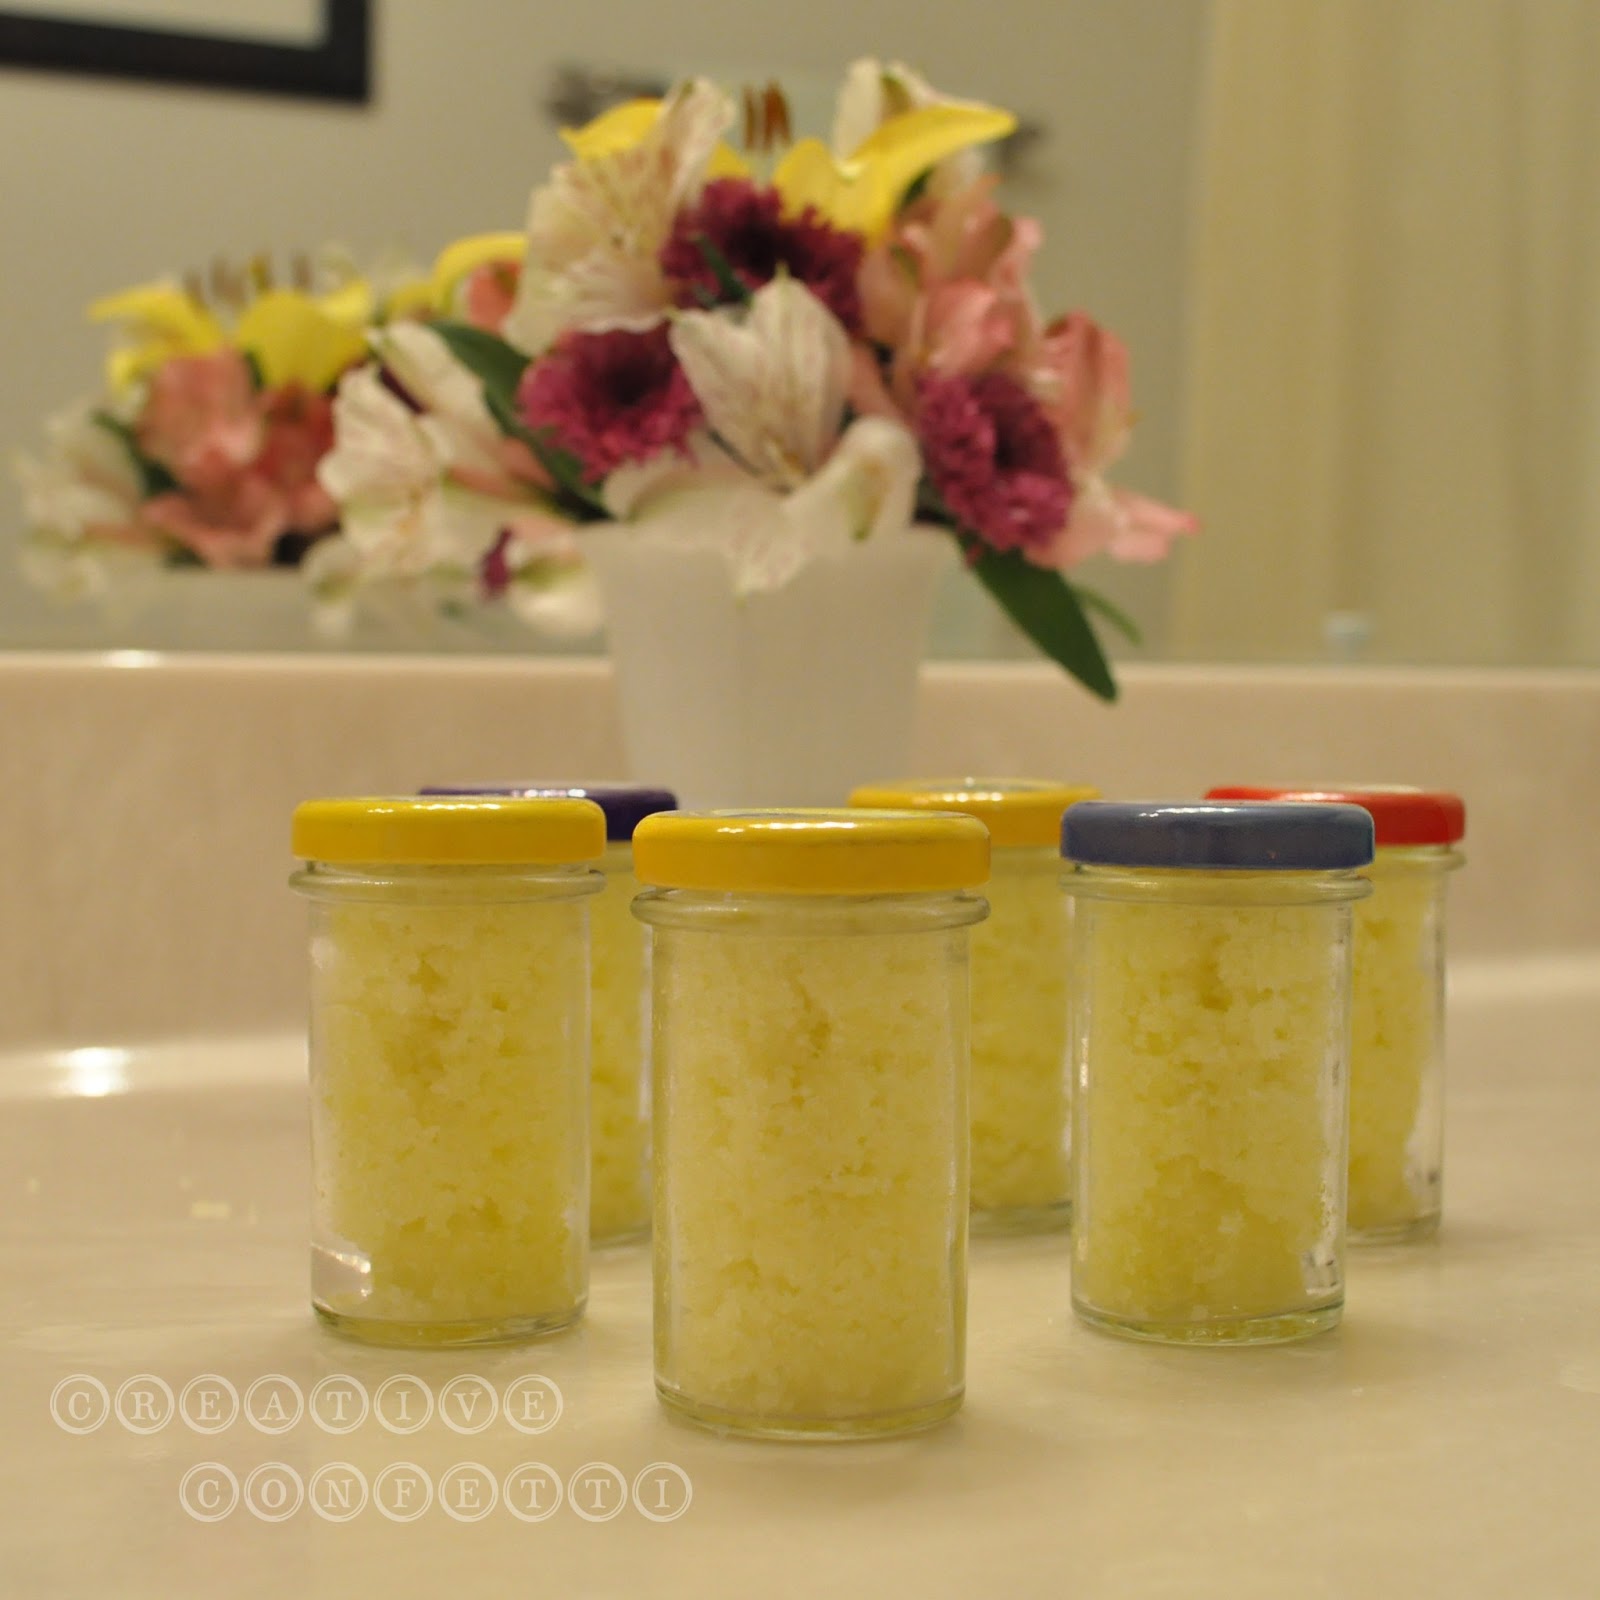
I filled tiny jars with sugar scrub as a party favor for each guest. These adorable little jars were bought at a flea market for 25¢ each! 
(Sugar scrub recipe found HERE.)

PARTY TIP: Print monograms on clear stickers and put onto pails with matching tulle for party favor packaging. The pails held the homemade sugar scrub.

Of course we had to have chocolate. The bars were wrapped in paper that matched our color scheme.

We also gave each girl a wire-bound journal wrapped in tissue paper and tulle. 
PARTY TIP: Use a vintage quilt to cover a table for a gorgeous shabby chic accent. I covered the coffee table with this beautiful pink quilt.

Here are the gorgeous guests with their Miss Tea Party titles. Such fun!
While I'm not in the picture, I was voted "Miss Silly", but that's because we didn't have a "Miss Laugh So Hard You Pass Out" title.

We also had a "photo booth" set up in the bathroom. Sure it seemed like an odd choice, but the counter was perfect for holding all the props. The girls also liked having the large mirror to try out the props before they posed. The shower curtain was a perfectly plain backdrop for the photos. I'm pretty sure everyone had a good time.


It was a perfect Sunday afternoon.


Thanks for stopping by. If you like what you've seen then give my page a "like" creative confetti (website) on Facebook, and subscribe on the right. Feel free to pin and share via the widget to the left. I'd also love to hear from you, so leave a comment or send me an email.

Tuesday, March 5, 2013

Acorn Squash (sigh)

I have zero excuses for ignoring my blog. I'm sure I've lost (again) the two or three of you who were hanging in there with me, and if there is anyone actually reading this post- thank you.

It's going to be a rather short post. I thought I would pass along a great recipe I tried tonight. There were going to be pictures (plural), but I was too busy cooking and drooling to get my camera out. I did remember to snap a shot of my plate before I snarfed the whole thing down.

I know. It's a horrible "shot from overhead" photo. It's also from 
my phone. (Don't judge.)


The squash was roasted then stuffed with rice, garlic, ground beef, black beans, green onion, spices, and topped with white cheddar. I also made a tomato-cilantro salad. It was so good that I'm having trouble breathing. That squash isn't the only thing that got stuffed. 

I'll leave a link to the site from which I got the recipes. You should definitely check out The Cozy Apron. Seriously- she has real pictures of the dish.

That's pretty much it for tonight. I'm hoping to be back on CC in a couple of days. In fact, I'm expecting a new lens to be delivered tomorrow. I can't wait to take it out and post a few pics. 

See you soon. (promise)


Thank you for visiting creative confetti!  Please take a moment to "like" creative confetti (website) on Facebook and/or follow me on Twitter or PinterestAnd I'd love to hear from you, so drop me a note via the comment section or the email option on my profile page! 

Friday, September 21, 2012

Diane's Good Cornbread


(Guest post by Jennifer Harris at Ponderings of an Elect Exile.)

I've been on a massive baking spree lately.  I think that yesterday was my 20th batch of chocolate chip cookies in less than 5 weeks, not to mention a whole host of other warm, yummy goodness during that time. I'm not typically such a baking fiend, but we were recently surprised with a new oven (and two new mixers!) after almost two years without an oven, so we've gone a bit baking crazy around here. :) 


When we found out we were getting a new oven, the kids (and my husband) began making a list of what they wanted to bake first.  Other than the aforementioned chocolate chip cookies, the list included banana bread, muffins, brownies, Dad's homemade pizza, baked potatoes, frozen pizza, lasagna, and biscuits (for biscuits and gravy).  Some of those things we'd figured out other ways to cook...in the microwave, crockpot, or toaster oven...but in pretty much every instance, they just weren't quite as good.  Other things...like Dad's pizza...we'd just had to give up on entirely.


While I was excited about all the things on their list, the thing I was most excited about was cornbread.  I'm a southern girl.  I love my cornbread.  Cooked in bacon grease, preferably in an iron skillet (although I made some seriously yummy cornbread in a glass pie plate for years when I didn't have cast iron), and smothered in butter.  Yum. 


When Tauna asked me a while back to guest post on her blog a while back, I said, "Sure!"  Then I asked what she'd like me to post about.  "How about a craft or recipe post?" was her reply.  


Now...I love crafting, and I've taught scrapbooking, paper arts, and other craft classes off and on for years.  But I haven't posted anything remotely crafty on my blog in...well, in a very long while.  As much as I would like to say otherwise, this hasn't been a very crafty season of life for me.  So the thought of a craft post at this point made me shudder a bit. :)  (Especially when Tauna's been doing such fantabulous crafty tutorials lately! ;-))


So...okay, a recipe.  The only problem there is...I have very few "original" recipes, and those I have aren't really "recipes"; they are more like "how-to-make-this narratives" (case in point: this post on Saloon Beef and Billy's Ridiculously Easy Crock Pot Mac-and-Cheese).  


Then I thought...aha!  I have been wanting to start a series on my blog of "vintage recipes"...recipes from family and friends along with the stories behind them.  I could share my grandmother's lemon chess pie recipe, which is one of my favorite desserts in the whole world, and second only to cornbread on my personal list of "what to bake next".  


I could breathe easy...I had the perfect plan.  Perfect, that is, until I discovered that Granny Kitty's recipe box was nowhere to be found.  ACKK.  I have turned the house upside down looking for it, and I have the other recipe box that has always, since I was first married, been right next to it...but no avocado green metal index card file decorated many years ago by my grandmother with orange and yellow Contac paper flowers.  :-(


So...on to plan C. D? Z?  I'd lost count, and I was beginning to fret a bit.  


And then a friend said, "What about that 'Good Cornbread' recipe?"  


I have such brilliant friends. :)


I actually blogged on the "Good Cornbread" recipe a few years back, but I had been thinking recently that I needed to do an updated post.  Finally, "Plan Final" for the guest post. :)


A little background on this recipe.  My Granny Marks made the world's best cornbread (along with the world's best fried chicken, the world's best dressing, and the world's best scrambled eggs.)  The scrambled eggs I can pretty much duplicate, but the rest are, I'm afraid, lost forever.  I'm not sure what happened to her recipe box, but unlike Granny Kitty's, which I know is here, and which I'm sure I'll find as soon as the lightbulb goes off about the "safe place" I put it :), I never had Granny Marks's, so there's little hope of ever finding it. 


Many years ago, though, a friend of my mom's gave her a recipe for "Good Cornbread".  I still have the original recipe card, in our friend's beautiful handwriting, with her personal notes on the recipe.  I really wanted to take a picture of the recipe card for this post...but, alas, it is in that same missing green recipe box. :-(  Fortunately, though, after temporarily losing track of it a few years ago, I got the recipe from our friend again via Facebook and posted it on my blog so we wouldn't lose it ever again. :)  And now it's going to be on Tauna's blog for double-backup!


The name of Diane's recipe is a bit deceptive.  It should be called "super-duper-good cornbread"  or "amazingly wonderful cornbread" or something else with lots of superlatives.  It's the best cornbread I've ever had next to my grandmother's (well, and my dad's jalapeno cornbread, but that's a totally different ball of wax. :))


Start out with an 8-inch pan.  For years, I made this cornbread in an 8-inch glass pie plate.  It turned out perfectly every time.  Now that I have cast iron again, I've been making it in my 9-inch cast iron skillet, because that's the smallest I have.  It works; the cornbread just isn't as deep, and you have to watch your cooking time a bit more closely.  One of these days I'm going to figure out how to convert the recipe to use my 10 inch skillet and make the deeper cornbread.  

I love my cast iron skillets.  They were gifted to me by a couple of friends, so they have a sentimental attachment for me...plus, they remind me of my grandmother. :) They came to me with that old, worn, almost silky seasoned surface that makes cooking in them a delight. Not sure why this one looks almost rusty in the photos...weird lighting in my kitchen, I guess.


Next, you need some bacon grease.  Because I don't want to have to cook bacon every time I bake cornbread, I keep bacon grease in this little vintage jar in the fridge.  Isn't it cute?  My friend Jodie found these several years ago after we'd had a discussion about storing bacon grease.   (And no, there's no bacon grease there...I took this photo back when she first gave me the jar. :))

PSA re. using glass to store bacon grease:  Always be sure to let your bacon grease cool a bit before transferring to the jar.  Thanks to my friend Jerri Sue for sharing this warning when I first posted about my jar...she learned this the hard way when she ended up in the ER getting stitches because her jar exploded. :-( 

Now...back to the bacon grease.   Add a "hunk" to your skillet, put the skillet in the oven, turn the oven on to 450, and heat till grease is smoking.  (I know...some of you are asking how much a "hunk" is.  You may have to experiment a bit to decide what works best for you.  I'm guessing my "hunk" is about 3 T.? More or less. ;-)  You don't want to skimp here, trust me.) 


While waiting for bacon grease to melt/smoke, begin gathering and mixing other ingredients.  The original recipe says to sift the dry ingredients together.  Diane's notes said she never sifts, and neither do I. :)  Toss a cup of cornmeal, 1/2 tsp. of salt, 1/2 tsp. of baking soda, and 1 tbsp. sugar together in a medium-large bowl.  


In another bowl, beat one egg and mix with one cup buttermilk.  Add to dry ingredients just before putting in oven, or mixture will rise in the bowl.  


When grease is smoking, pour cornbread batter in skillet.  Bacon grease will come up over the edges of the batter and look a bit funky.  This is good.  It makes that delectable crispy-crunchy-yummy crust that other cornbreads envy. :)


Bake for 20 minutes at 450.  (Watch closely if you are using a larger skillet...it will bake faster because it's not as thick.)  


Grab a piece for yourself quick before your family inhales the rest. :)   If you are lucky enough to have leftovers, they are great warmed with butter and a bit of maple syrup or honey for breakfast.  Yummm. 


Diane's "Good Cornbread"

1 c. cornmeal
1/2 t. soda
1/2 t. salt
1 T. sugar
1 egg
1 cup buttermilk

Sift dry ingredients together. (She doesn't, and neither do I :)). Beat one egg and mix with buttermilk. Add to dry
ingredients just before putting in oven, as they will rise in the bowl if prepared too far in
advance.  Add a hunk of bacon grease to the pan, place in oven and heat oven to 450.  Keep pan in oven until grease is smoking. Add batter and bake about 20 minutes. Makes an 8 inch round skillet of cornbread.


Huge thanks to Tauna for letting me guest post here at creative confetti!  Tauna has been one of my dearest bffs for over half a lifetime.  I remember being so excited when she first started her blog...from her Haiti Journals to her photo tours of downtown Nashville to her crafty tutorials to her pics of her beautiful family...and everything in between...creative confetti is one of my very favorite blogs ever. :)   


I'm thrilled to be posting here today, and would love to "meet" you, her readers, in the comments.   Tell me about your favorite family recipe, or the food you most craved but couldn't for whatever reason have at some point in your life.  I'd love to hear all about it! 


Jennifer Harris 

Tuesday, August 28, 2012

Cast Iron Skillet Apple Pie

I've had a few people ask for this recipe, but it's almost embarrassing to tell because it's just. so. stinking. simple. You know what else it is?

Ridiculously delicious!

Here's the pie.

I love the caramel syrup that bubbles up from the bottom. 
That's heaven in a skillet folks. 
(We even fuss over who gets the scrapings from the bottom of the pan.)


Ingredients list

4 lg Granny Smith apples
1-2 other apples depending on size (Gala, Fuji, Envy, or other)
1 refrigerated, ready-made pie crust (2 pieces)
1 stick of butter
1+ c of brown sugar (packed)
½ c sugar
2 tbs cinnamon
2 tsp nutmeg
1 tsp ginger
2 tbs flour
egg white & water mixture
a tiny mixture of cinnamon sugar (about 2 tsp)

Here's how I made it.


Peel and cut apples and put them into an acid-water bath to keep them from turning brown. You can use lemon or lime in the water. I used pineapple juice and water. I also like to throw in a surprise apple or two to mix it up with the Granny Smiths. This time I used 1½ Envy apples.
(Get your pie crusts out of the box, so they can warm to room temperature while you prepare your apples.)


Into a jar put 1/2 to 2/3 cup of sugar. I got carried away and used more sugar than I usually do. Add the flour to the sugar. This keeps the pie from getting runny inside. Nobody likes runny insides!
The next part was hard for me because I tried to come up with exact measurements for the spices for you precise people. I usually just dump my spices in until it looks and smells right to me. 
Now shake up the dry ingredients, but put the lid on first! I guess you could use a bowl and spoon to stir them up, but why?


Melt your butter over low-medium heat then add the brown sugar. I tend to add a little more than one cup. (Paula Deen would be proud.) Mix it together until it looks like chocolate gravy. Mmmmm. 


Lay your bottom crust on top of the gooey, delicious goodness. Now place your well drained apples on top of the crust. Don't dump them in because it will tear right through the dough. Remember it's floating on a sea of yummy, so it's a little delicate.


Pour the sugar mixture over the apples and breathe deep. 
It already smells amazing.


Cut a vent hole in the top crust and place it over the apples. I usually use a cookie cutter, but the only one I could find was a huge star, so I guess we're having patriotic pie tonight. 
Tuck the top crust down along the edges. Sometimes I worry about how it looks, so I try to get my edges pretty. Most of the time I don't care because no one will remember what it looks like. I promise! 


Using an extremely soft brush, or in this case my fingers, wash the top crust with the egg white-water mixture. You will want to do this lightly. Don't let it pool in the crevices. Sprinkle a little cinnamon sugar on top of the egg wash. This makes the crust glisten with a beautiful golden color. 
Now wrap  the edges with foil so they don't burn.  

Bake at 350° for 35 minutes and remove foil
Continue baking for 10-15 minutes depending on your oven, altitude, blah, blah, blah.

Let the pie cool on a baking rack for at least 15 minutes before serving. You should wait longer than that, but I dare you to try.


Enjoy.
And please come back to let me know if you give this try. 
I'd love to hear how it turned out for you.

Thank you for visiting creative confetti!  Please take a moment to "like" creative confetti (website) on Facebook and/or follow me on Twitter. And I'd love to hear from you via the comment section or the email option on my profile page!  
Related Posts Plugin for WordPress, Blogger...
Animated Social Gadget - Blogger And Wordpress Tips